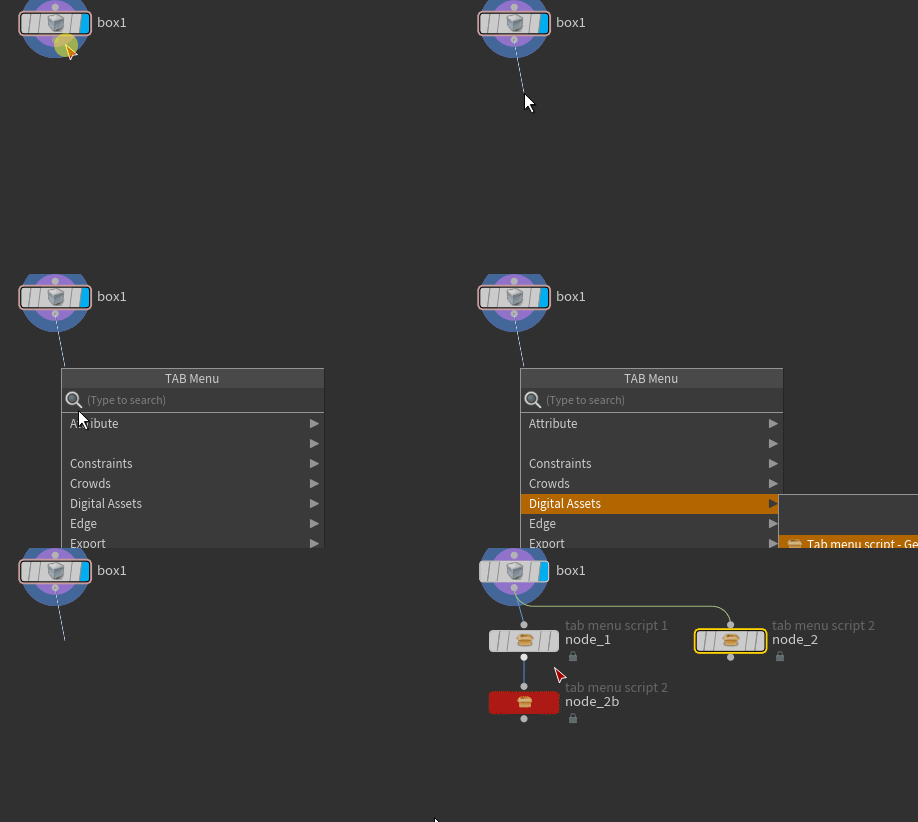
This is a guide on how to add scripts to the TAB menu in Houdini.
This includes adding node presets to the menu without duplicating the node, putting down multiple nodes at once and more.

The following tutorial presumes you are familiar with the basics of HDA development in Houdini and have some understanding of Python.
1) Go into the edit mode on an HDA and go to the Type Properties.
Then navigate to “Interactive” -> “Shelf Tools” and from the drop-down “Create New” menu, select “Default Tool“.
2) Select the new entry in the Tools list and under “Options” fill in the Name and Label as if you were making a new HDA. The name will be the (unique) name of your new tool and the Label will show up in the TAB menu.
3) Go to the Context tab and make sure to check the box for whatever context you want the tool to show up in. So in most cases you probably want to tick the SOP box. This Tab generally controls where the tool will show up. You can even set a custom “TAB Submenu Path” including subfolders.
For example you could write:
My Tools/tests
Then your tool would show up in the folder “My Tools” in the TAB menu under the subfolder “tests”.
4) Finally go to the Script tab and edit the script and confirm changes with Apply or Accept. Here is my example script:
import soptoolutils

# Create node1, name and attach it
node1 = soptoolutils.genericTool(kwargs, '$HDA_NAME', merge_context=True, nodename = 'node_1')
node1.parm('test').set(1)  # Set one of its properties

# Create node2 on the same level as node1 and attach it to same parent
node2 = soptoolutils.genericTool(kwargs, 'DS::tab_menu_script_2::1.0', merge_context=True, nodename = 'node_2')

# Move node2 to position of node1 with relative offset
node_pos1 = node1.position()
node2.setPosition(node_pos1 + hou.Vector2(3, 0) )

# Alternatively move node2 to any viable position
# node2.moveToGoodPosition()

# Create node3 attached to node 1
node3 = node1.createOutputNode('DS::tab_menu_script_2::1.0', node_name = 'node_2b')
node3.setColor(hou.Color(1,0,0))  # And colorize it
Note that ‘DS::tab_menu_script_2::1.0’ is the name of one of my HDAs and $HDA_NAME is the name of the HDA that contains the script.
Note that all of these manipulations can be done on the original tool and that you can add multiple tools to one HDA.
Important:
Do not put the same Tab menu script (with the same name) into two different HDAs. Houdini will be confused and not know which script to actually use. This also means that if you have two or more versions of the same HDA in the same .HDA file, you should remove the scripts from older versions of the node!
You can download my example file here:
https://www.dropbox.com/s/8f9j1ncur2mu8es/tab_menu_example.hdalc?dl=0
As always, please send me a message, if the link is broken or anything in the tutorial is unclear.
