Houdini Tab menu scripts

This is a guide on how to add scripts to the TAB menu in Houdini.
This includes adding node presets to the menu without duplicating the node, putting down multiple nodes at once and more.
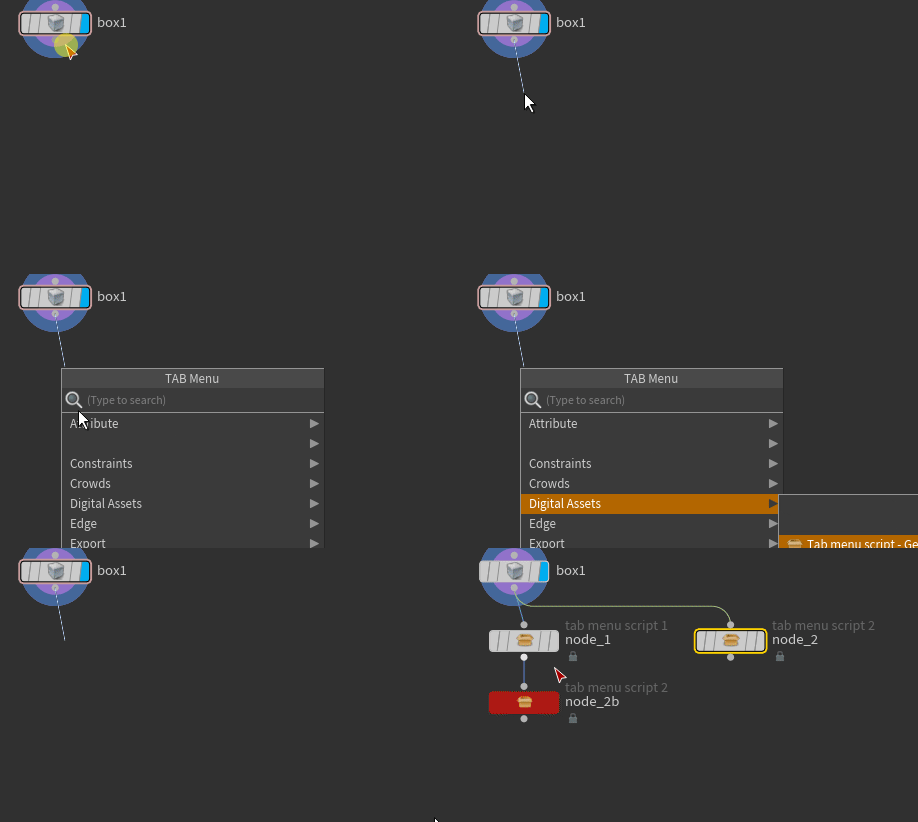

The following tutorial presumes you are familiar with the basics of HDA development in Houdini and have some understanding of Python.

1) Go into the edit mode on an HDA and go to the Type Properties.
Then navigate to “Interactive” -> “Shelf Tools” and from the drop-down “Create New” menu, select “Default Tool“.

2) Select the new entry in the Tools list and under “Options” fill in the Name and Label as if you were making a new HDA. The name will be the (unique) name of your new tool and the Label will show up in the TAB menu.

3) Go to the Context tab and make sure to check the box for whatever context you want the tool to show up in. So in most cases you probably want to tick the SOP box. This Tab generally controls where the tool will show up. You can even set a custom “TAB Submenu Path” including subfolders.
For example you could write:
My Tools/tests

Then your tool would show up in the folder “My Tools” in the TAB menu under the subfolder “tests”.

4) Finally go to the Script tab and edit the script and confirm changes with Apply or Accept. Here is my example script:

import soptoolutils

# Create node1, name and attach it
node1 = soptoolutils.genericTool(kwargs, '$HDA_NAME', merge_context=True, nodename = 'node_1')
node1.parm('test').set(1)  # Set one of its properties

# Create node2 on the same level as node1 and attach it to same parent
node2 = soptoolutils.genericTool(kwargs, 'DS::tab_menu_script_2::1.0', merge_context=True, nodename = 'node_2')

# Move node2 to position of node1 with relative offset
node_pos1 = node1.position() 
node2.setPosition(node_pos1 + hou.Vector2(3, 0) )

# Alternatively move node2 to any viable position
# node2.moveToGoodPosition()

# Create node3 attached to node 1
node3 = node1.createOutputNode('DS::tab_menu_script_2::1.0', node_name = 'node_2b')
node3.setColor(hou.Color(1,0,0))  # And colorize it


Note that ‘DS::tab_menu_script_2::1.0’ is the name of one of my HDAs and $HDA_NAME is the name of the HDA that contains the script.

Note that all of these manipulations can be done on the original tool and that you can add multiple tools to one HDA.

Important:
Do not put the same Tab menu script (with the same name) into two different HDAs. Houdini will be confused and not know which script to actually use. This also means that if you have two or more versions of the same HDA in the same .HDA file, you should remove the scripts from older versions of the node!

You can download my example file here:
https://www.dropbox.com/s/8f9j1ncur2mu8es/tab_menu_example.hdalc?dl=0

As always, please send me a message, if the link is broken or anything in the tutorial is unclear.

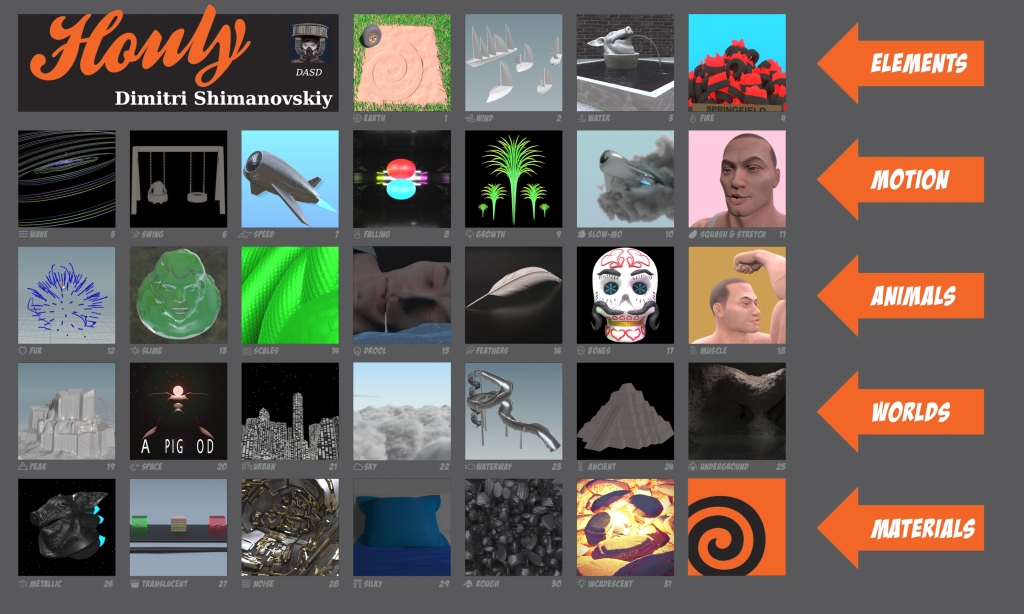
HOULY 2020 results

In July 2020 SideFX (developers of Houdini) organized a month-long challenge with changing daily themes. There were daily and weekly winners, as well as an IRON MAN category for those that would create an artwork (or tool) for every day of the month.

I gave it a go, did things I don’t usually do with Houdini and learned a lot. I mostly learned about all the things I still have to learn. XD
Anyways, here’s the result:

You can find an overview of all IRON men and women, here:
https://www.sidefx.com/forum/topic/74883/?page=1

And all daily winner entries are here:
https://www.sidefx.com/community-main-menu/houly-daily-challenge/


Quick Tip: Build an editor Utility in UE4 (Updated August 2020)

Skip to 57:00 for the actual start of the tutorial.

This stream covers how to build Editor Utility tools in Unreal. These tools can handle meta tasks, like editing assets (Actors) in a scene or the content browser. For example, you could make a tool that renames assets that don’t follow a naming convention, or a tool that fixes actor placements in a level.
These tools seamlessly integrate into the right-click menu of the Unreal Editor. All of this can be done with Blueprints.

Note this feature has existed in some form in Unreal since version 4.20.

[Updated, because the original post lead to a dead link and was generally outdated.]

Physically based Shaders for Houdini

If you are looking for an alternative to the Houdini 15 physically based shaders, you might want to try PhyShader v1.2.0 by rsd/groundflyer.

https://github.com/groundflyer/physhader-for-mantra
https://www.sidefx.com/index.php?option=com_forum&Itemid=172&page=viewtopic&t=37247

For a quick and easy install just download the zip from git and unpack the “gallery” “vex” and “otls” folders to C:\Users\[USERNAME]\Documents\houdiniXX.X
If you did that right, the material will show up in your material palette.

Give it a go!

[This is a repost of an older post, which I had to delete due to reasons. Also updated the version number. ]

How to access embedded files in HDAs

If you work with Houdini, you eventually get to make HDAs. Then you might want to put all sorts of stuff in there in order to deliver a complete package to the end-user or to put it on Orbolt. You might want to add textures, substances, geometry, other HDAs, etc.

It’s fairly easy to get the files in there:
To attach a file to an HDA:

rightclick on HDA->Type Properties…->Extra Files (TAB)->Filename (from harddrive)->Add File

But the syntax for reading the file out inside the HDA is a little confusing. So here it goes:

opdef:/Network_type/asset_name?section_name

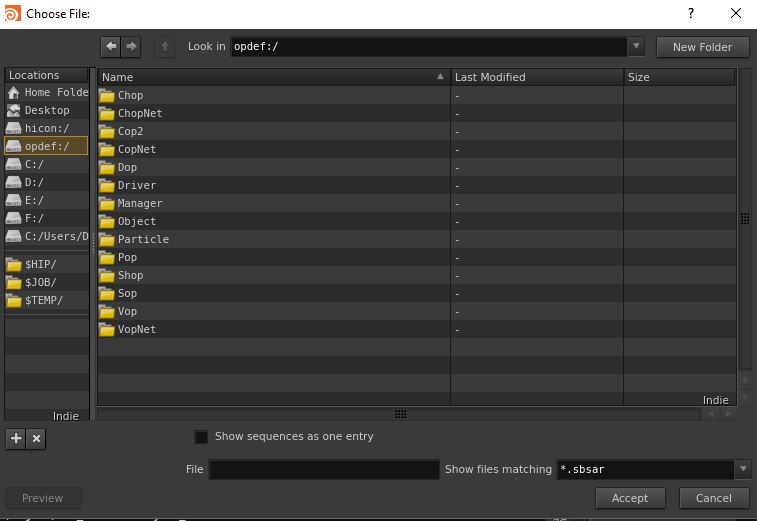
“Network_type” is the context of your HDA (that contains the attachment). If your HDA is a shader, “Network_type” is probably “SHOP”, if your HDA is in obj context, “Network_type” is Object etc. See picture below for a list of possible “Network_type”s.

“asset_name” is the name of your HDA (that contains the attachment).

“section_name” is the name of your attached file with its file extension.

Finally you get something like:

opdef:/Object/My_HDA_v01?pretty.png


Also, you can always browse opdef:/ in the “choose file menu”. You can reach this menu via a File parameter.

conext


The official documentation is also good:

http://www.sidefx.com/docs/houdini/assets/create

QLib Windows installation instructions


QLib is a library of free and useful HDAs for Houdini. Installing it can be a bit tricky, if you don’t have any experience with Git or environment variables.

Here’s my step by step installation guide for Windows:
[Last updated in April 2021:]
The qLib devs have installation instructions that you see when scroll down on
https://github.com/qLab/qLib
My instructions go into a little more detail (and only for Windows).

1. Get and install git:
https://desktop.github.com/

If you don’t have one already, make a free GitHub account and log in. Make sure to be logged in on GitHub in your webbrowser of choice.

2. In your windows explorer, make a folder with a simple name path (no blanks and no signs, just letters and or numbers) on one of your local harddrives. A structure like: E:\Houdini or C:\Houdini is perfectly suitable.

The qLib files will be saved here. All your Houdini installations can use the same qLib library. When qLib gets updated and or expanded you can update your local version via the GitHub Desktop application and all your dependencies should still work.
When you make an HDA that uses qLib nodes you will have to provide the used qLib nodes with your HDA to make it work on other computers (unless those machines also have qLib installed). Note that it is possible to embed HDAs in each other (but that is a topic for another tutorial).

3. Go to:
https://github.com/qLab/qLib

Click on: Clone or download

(That’s the big green button on the top right. It should appear when you are logged into the GitHub website)

Click on: Open in Desktop

Your browser should suggest to open with GitHub – I tested this with Firefox. Accept.

And select the folder created in step 2. Accept.

GitHub will now download qLib.

4. You should close all your open Houdini programs.

The following instructions require Houdini 17.5 or higher. If you have an older version, or are simply curious about the old stuff, scroll down to the legacy instructions section:

5. In your explorer, go to your equivalent of:
C:\Users\[USERNAME]\Documents\houdini18.5

And if you don’t have a folder called “packages” in there, create it, you have something like:
C:\Users\[USERNAME]\Documents\houdini18.5\packages

6. Copy the qLib_windows.json file from qLib into the packages folder

7. Open the copied .json file in a text editor of your choice. (Even Windows Notepad will do). 
Edit the “QLIB” line (and only that line) to point to your qLib directory.
The outcome will look a bit like this:

“QLIB”: “C:/Houdini/qLib”,

And save the result.

7. Start up Houdini. When you press TAB to put down a node, you should notice the qLib category.
If you have issues with Houdini after installing qLib, you can remove qLib from Houdini by removing the .json file from the packages folder.


When qLib gets an update (you might want to become friends with them on facebook https://www.facebook.com/qLibHoudini/ to get the news) you can open GitHub, select qLib and press Sync on the top right. Note that this might override local changes.
You might want to make your own versions of HDAs that you are using.


Legacy instructions (Houdini 17.0 and below):

5. In your explorer, go to your equivalent of:
C:\Users\[USERNAME]\Documents\houdini17.0

(Substitute [USERNAME] and Houdini version respectively.) And open houdini.env with a text editor.

6. At the bottom of the document add the following 4 lines:
QLIB=”E:/Houdini/qLib”
QOTL=”E:/Houdini/qLib/otls”

HOUDINI_PATH = $HOUDINI_PATH;$QLIB;&

HOUDINI_OTLSCAN_PATH = $QOTL/base;$QOTL/future;$QOTL/experimental;$HOUDINI_OTLSCAN_PATH;&

NOTES:
If you have the gamedev toolshelf installed the Houdini Path might look like:
HOUDINI_PATH = $HOUDINI_PATH;$APPDATA\SideFX\GameDevToolset\17.0\1.119;$QLIB;&

Note: Here the folder created in step 2 was:
E:\Houdini\
You will need to adjust this part depending on what you named things and where you put it.

So for something like:
C:\derp\aderp\
the first line would have to be
QLIB=”C:/derp/aderp/qLib/”

7. Start up Houdini. When you press TAB to put down a node, you should notice the qLib category.
If you have issues with Houdini after installing qLib, you can remove qLib from Houdini by removing the lines created in step 5.

Change shelf height in Maya!

To change the size of your shelf in Maya just use the following mel command:
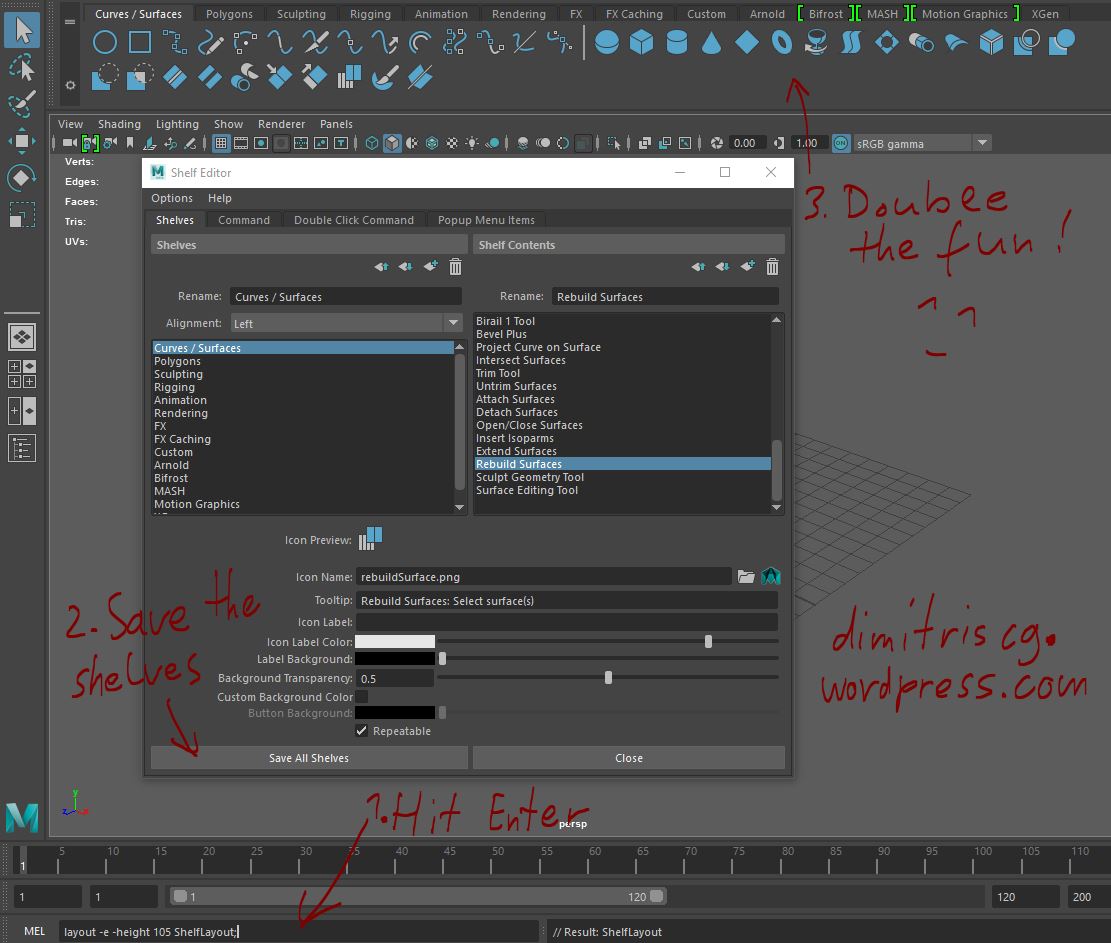
1. layout -e -height XX ShelfLayout; //replace XX with desired height in pixels

For example, to double the size of the shelf in Maya I had to use:
layout -e -height 100 ShelfLayout;

To make sure the new setting is saved you can:

2. Rightclick on a shelf icon -> Edit,  click Shelves, click Save All Shelves

3. Restart Maya to see the actual result.

increase shelf size maya

After some searching I found the layout command on: http://oshanz.blogspot.nl/2012/08/maya-double-shelf-height-toggle.html , so credit goes there.

Quicktip: Use transparency with Stingray PBS shaders in Maya 2016 ext 2 (Maya 2016.5)

Stingray PBS are the implementation of Physically based real-time shaders in Maya. They are especially useful for previewing game art as it would appear in a modern Engine like Unreal Engine 4 or Unity 5.

To get them to work in a scene, create a new Stingray PBS shader in
Hypershade, or Right click -> Assign New Material
Note: Changing another Material to Stingray PBS via its attributes may cause the Stingray PBS shader to bug out and not initialize properly.

The Stinray PBS shader is fairly straight forward:
The sliders under Attributes change the basic preview values.
To use a texture, assign it under Textures and tick the corresponding box under Attributes. This will override the slider and make the shader use the texture.

If you need transparency:
In Maya 2016 ext2 you can click on the Preset Material drop-down and select preset/Standard_Transparent. This will add a Use Opacity Map tickbox. The shader will use the alpha channel of the color texture when activated.

In earlier versions of Maya, you don’t have this option. But you could add it, because the Stingray PBS shader is actually just a Shader FX network. You can open this network by clicking Open ShaderFX in the material attributes. Click on Make Unique so you don’t edit Maya’s preset, but a unique version of the shader.
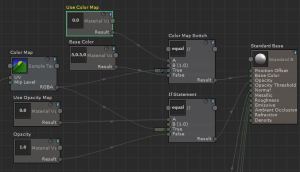
Here’s the network for the transparent material:
Shader FX